Size Guide for Limited Edition Oversized Zip Hoodie

Shopping online for clothing can be challenging and stressful, often leaving you anxious about getting the perfect fit—worried it might be too long, too wide, too short, too tight, or too baggy when it arrives.

At Clara & Leila, we understand your concerns, that’s why we’ve created a detailed page with clear instructions, allowing you to easily select the right size using just a ruler or measuring tape and a garment you already own.

How To Measure - Limited Edition Oversized Zip Hoodie

We recommend measuring a garment you already own that fits you well, like a hoodie or a sweater.
 

This helps you compare it directly to our size charts and choose the right size without guessing. Lay the garment flat on a smooth surface and use a soft measuring tape or ruler. Don’t stretch the fabric—keep it relaxed.

Size Chart (cm) S M L XL XXL
Shoulder to Shoulder
59
61
63
65
67
Chest
65
67
69
71
73
Outfit Length
69
71
73
75
77
Sleeve Length
60
61
62
63
64
1. Shoulder to Shoulder

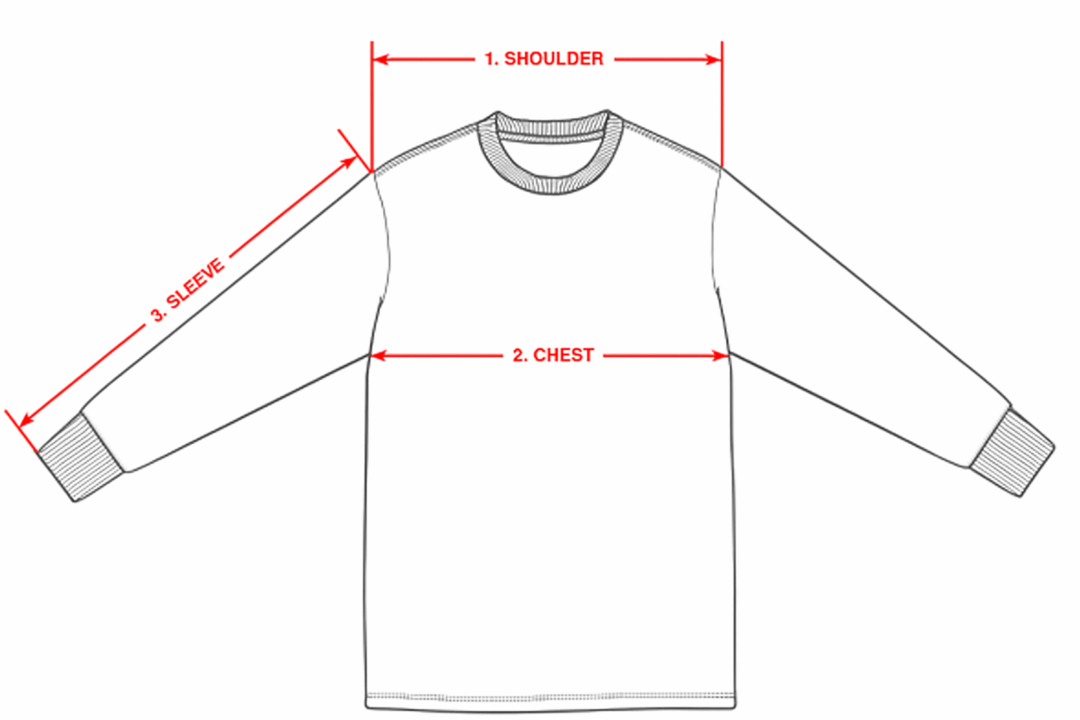
This measures the width across the shoulders of the garment, from one shoulder seam to the other. It’s important for ensuring the top doesn’t feel too tight or droopy at the shoulders.

  • Step 1: Lay the garment perfectly flat on its back without stretching it.
  • Step 2: Find the shoulder seams—these are the stitched lines where the sleeves attach to the body of the top.
  • Step 3: Place one end of the measuring tape at the edge of one shoulder seam (right where the seam meets the sleeve).
  • Step 4: Stretch the tape straight across to the edge of the opposite shoulder seam.
  • Step 5: Read the measurement in cm.
2. Chest (Armpit to Armpit)

This is the width across the chest area, measured flat. It’s essentially half the full chest circumference of the garment and helps determine if the top will fit comfortably around your bust/chest without being too snug or baggy.

  • Step 1: Lay the garment perfectly flat on its front.
  • Step 2: Smooth out any wrinkles, but don’t pull or stretch the fabric.
  • Step 3: Find the armpit seams—these are the stitched lines under the arms where the sleeve meets the body.
  • Step 4: Place one end of the measuring tape at the bottom edge of one armpit seam.
  • Step 5: Stretch the tape straight across the front to the bottom edge of the opposite armpit seam.
  • Step 6: Read the measurement in cm. 
  • Tip: Measure about 2-3 cm below the armpit for accuracy if the seams are curved. For stretchy fabrics, it might expand a bit when worn.
3. Sleeve Length

This measures the length of the sleeve from the shoulder seam to the cuff. It’s useful for long-sleeve tops to ensure the sleeves aren’t too short or long on your arms.

  • Step 1: Lay the garment flat with the sleeve extended straight out (not folded).
  • Step 2: Find the shoulder seam (where the sleeve attaches to the body).
  • Step 3: Place one end of the measuring tape at the top edge of the shoulder seam (right at the stitching).
  • Step 4: Run the tape along the outer edge of the sleeve (the top side, following any curve) down to the end of the cuff or hem.
  • Step 5: Read the measurement in cm.
4. Outfit Length (Top to Bottom)

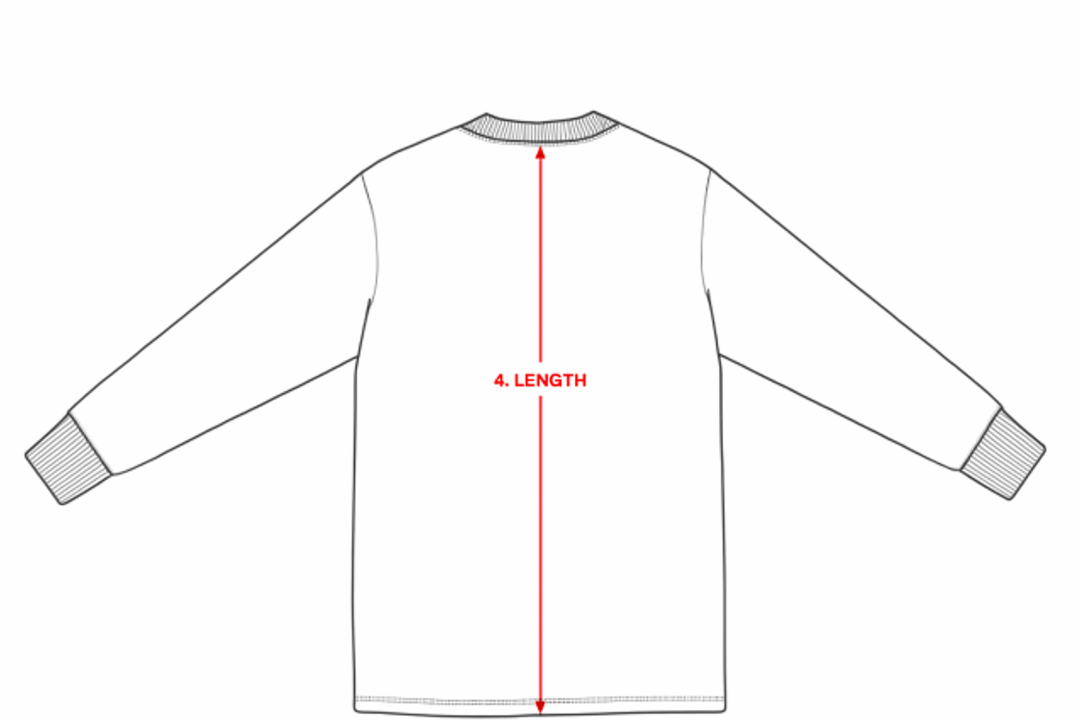
This measures the full length of the outfit from the highest point at the shoulder to the bottom hem. It’s key for knowing where the outfit will hit on your body (e.g., at the waist for crops or hips for standard lengths).

  • Step 1: Lay the garment flat on its back.
  • Step 2: Identify the highest point of the shoulder—this is usually near the neck seam, at the top of the shoulder line (not the collar).
  • Step 3: Place one end of the measuring tape at that highest shoulder point.
  • Step 4: Run the tape straight down the center of the back (or front, if it’s symmetric) to the bottom edge of the hem.
  • Step 5: Read the measurement in cm. (If the hem is uneven, measure to the longest point.)
  • Tip: Measure the back if the front is shorter due to design. If your garment is curved at the bottom, follow the center line.